Bloodstained Ritual of the Night Hidden Desert Guide
Making your way through the atrocious swimming portion of the Forbidden Underground Passage will land you in the Hidden Desert area. This area is rather large and maze like, but has a fairly straight run to the boss. To help you find your way, use our Hidden Desert guide below.
Hidden Desert Map

The Hidden Desert can be a bit confusing to navigate so use this map to get your bearings. As you can see the central run to the boss is fairly straightforward.
Hidden Desert: Reaching Boss

The first room you will enter is a long room with multiple exits. To reach the boss of the Hidden Desert, make your way through the first right exit you see. This exit leads to a long corridor room. Run through this room and continue heading right to reach a Fast Travel room.
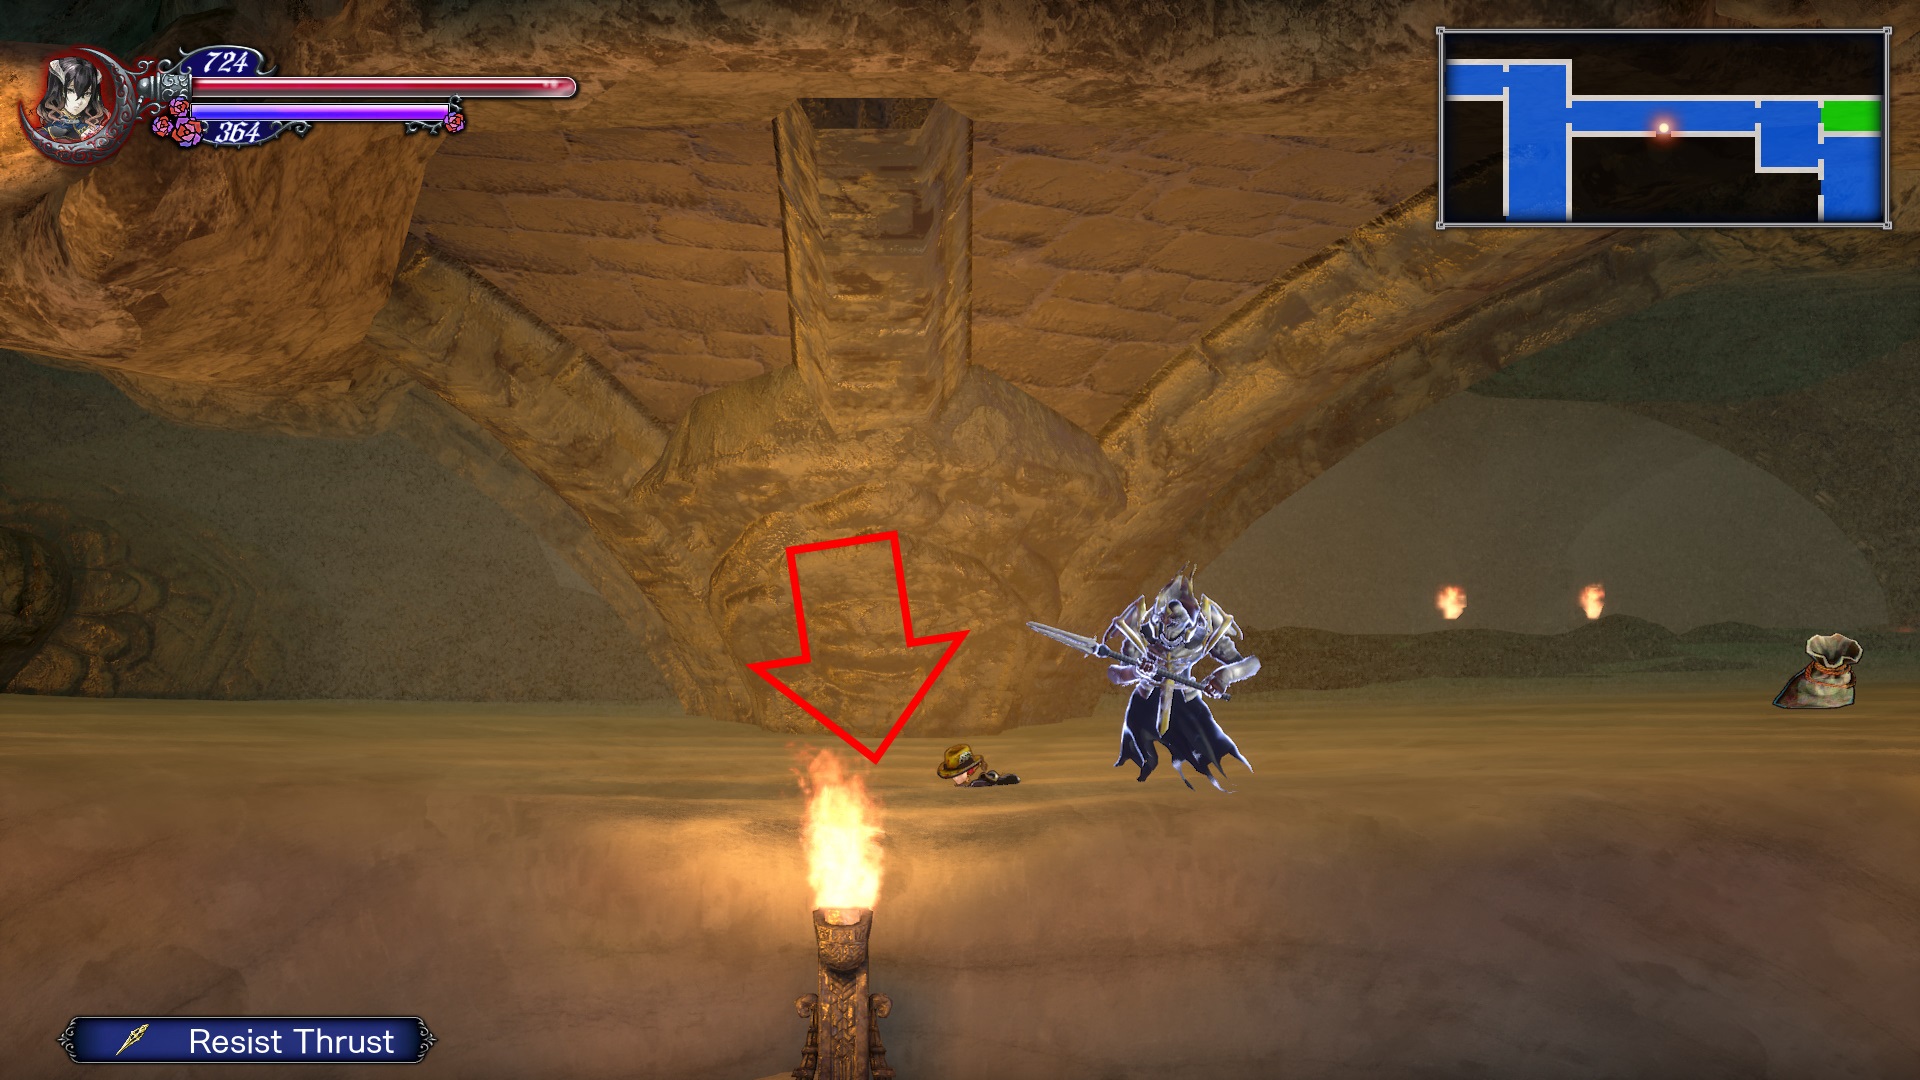
From here leave the Fast Travel room and drop down. Make your way to the bottom right exit. Drop down this next room, grab the Materials Chest and take the bottom right exit. Make your way through the large room, grab the Materials Chest on the left side and then take the top exit. Enter the left room to reach a Save Room. Leave the Save Room and head right. Board the elevator and ride it all the way to the top to reach the Hidden Desert boss.
Hidden Desert Boss: Alfred
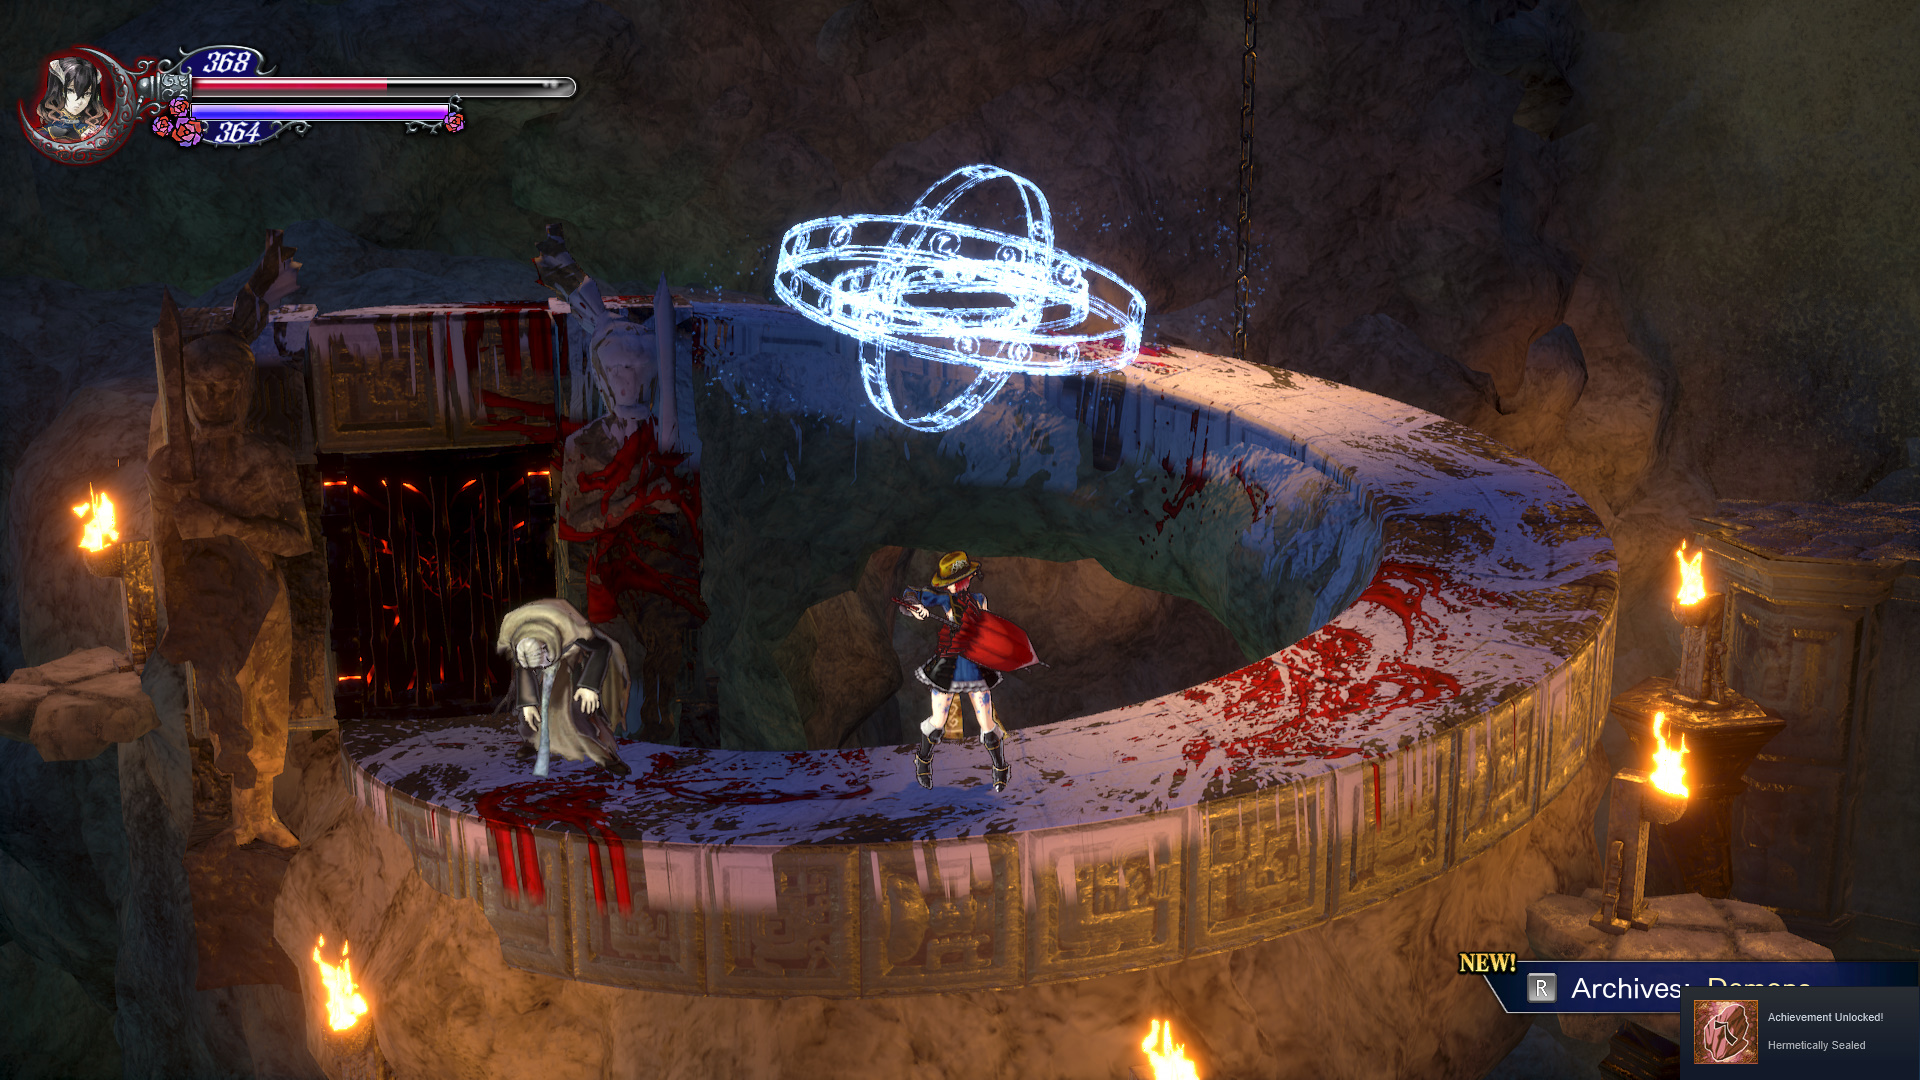
The boss you will face in the Hidden Desert is Alfred. The fight with Alfred is rather straightforward, he will run around the circle area throwing different attacks at you that apply various status effects. As the fight progresses he will call in some circles that slow you down when touched. To prep for this fight make sure you have the best equipment possible and slew of consumable items to deal with status effects. Once Alfred is defeated you will unlock the Hermetically Sealed achievement/trophy.
Leave the boss arena through the door you entered and ride the elevator down one stop. Get off and head right. Go up to the crystal and collect it to get the Deep Sinker ability. This ability can be used in the Forbidden Underground Waterway to advance the story. Stop on the lowest floor to reach a Materials Chest.
Hidden Desert: Exploration
Return to the start of the area and head into the long corridor room we passed through with the sinking sand. Inside this room you can drop down the middle of the sand into a second room. On the far right side of this room is a Materials Chest. Open it then head into the room on the left. Avoid falling through the quicksand at the bottom of this room and grab the Materials Chest. Fall down the quicksand into the room below.
Grab both Materials Chests in the next two rooms and make your way into the next room which has two Ghost enemies in it. Walk all the way to the right in this room to reach a MAXHP UP. Grab it then jump up to the floor above through the falling sand. Head right to reach the room by the Fast Travel Room. Return to area entrance.

Now that we’ve cleared the right side of the Hidden Desert, let’s head deeper. Drop from the entrance and go through the exit on the left side of the room. Grab the Materials Chest in the next room then make your way up to the top of the room to get a MAXMP UP. Drop back down to the middle exit heading left.
In the next room make your way from right to left and grab the Materials Chest along the way. Exit via the lower left door to reach a room with another Materials Chest inside it. Return to the previous room and take the upper left exit.

Inside the room with the falling sand coming from the roof use a combination of Double Jump and Reflector Ray ability to reach the room above. In this room there is a MAXHP UP and a Green Chest with POTENT AMMUNITION/R. Grab both and drop back down below. Head into the room on your left.
Grab the Materials Chest in the lower corner of this room then make your way up to the top left exit. Head inside the next room. Head left through this quicksand room until you reach a room with a Green Chest in it. Use your Reflector Ray ability to reach the chest. Inside it is the Weighted Ring. Head back into the quicksand room and drop down through the floor (obvious mark on you minimap).

When you drop you will enter a middle room between the top and bottom quicksand rooms. Don’t do anything here yet, simply drop down another room so you are in the bottom room (has a dog head in it). Head to the left and hit the left wall to reveal a secret room. Go inside this room and grab the chest in the sand to get the Traveler’s Hat. Leave this room and make your way right through the quicksand room. Grab the Materials Chest in the sand before the door. Return to the middle room.
If you head left through the middle room you will eventually reach a new portion of the Forbidden Underground Waterway.
More: Bloodstained: Ritual of the Night guides.