Borderlands 3: Floodmoor Basin Crew Challenges Guide
As you progress the story you will arrive on the planet of Eden-6. The zone you will land in is called Floodmor Basin. In Floodmor Basin there are a total of nine Crew Challenges for players to complete. Use our Floormood Basin Crew Challenges guide below to complete them all.
Floodmoor Basin Crew Challenges Locations Map
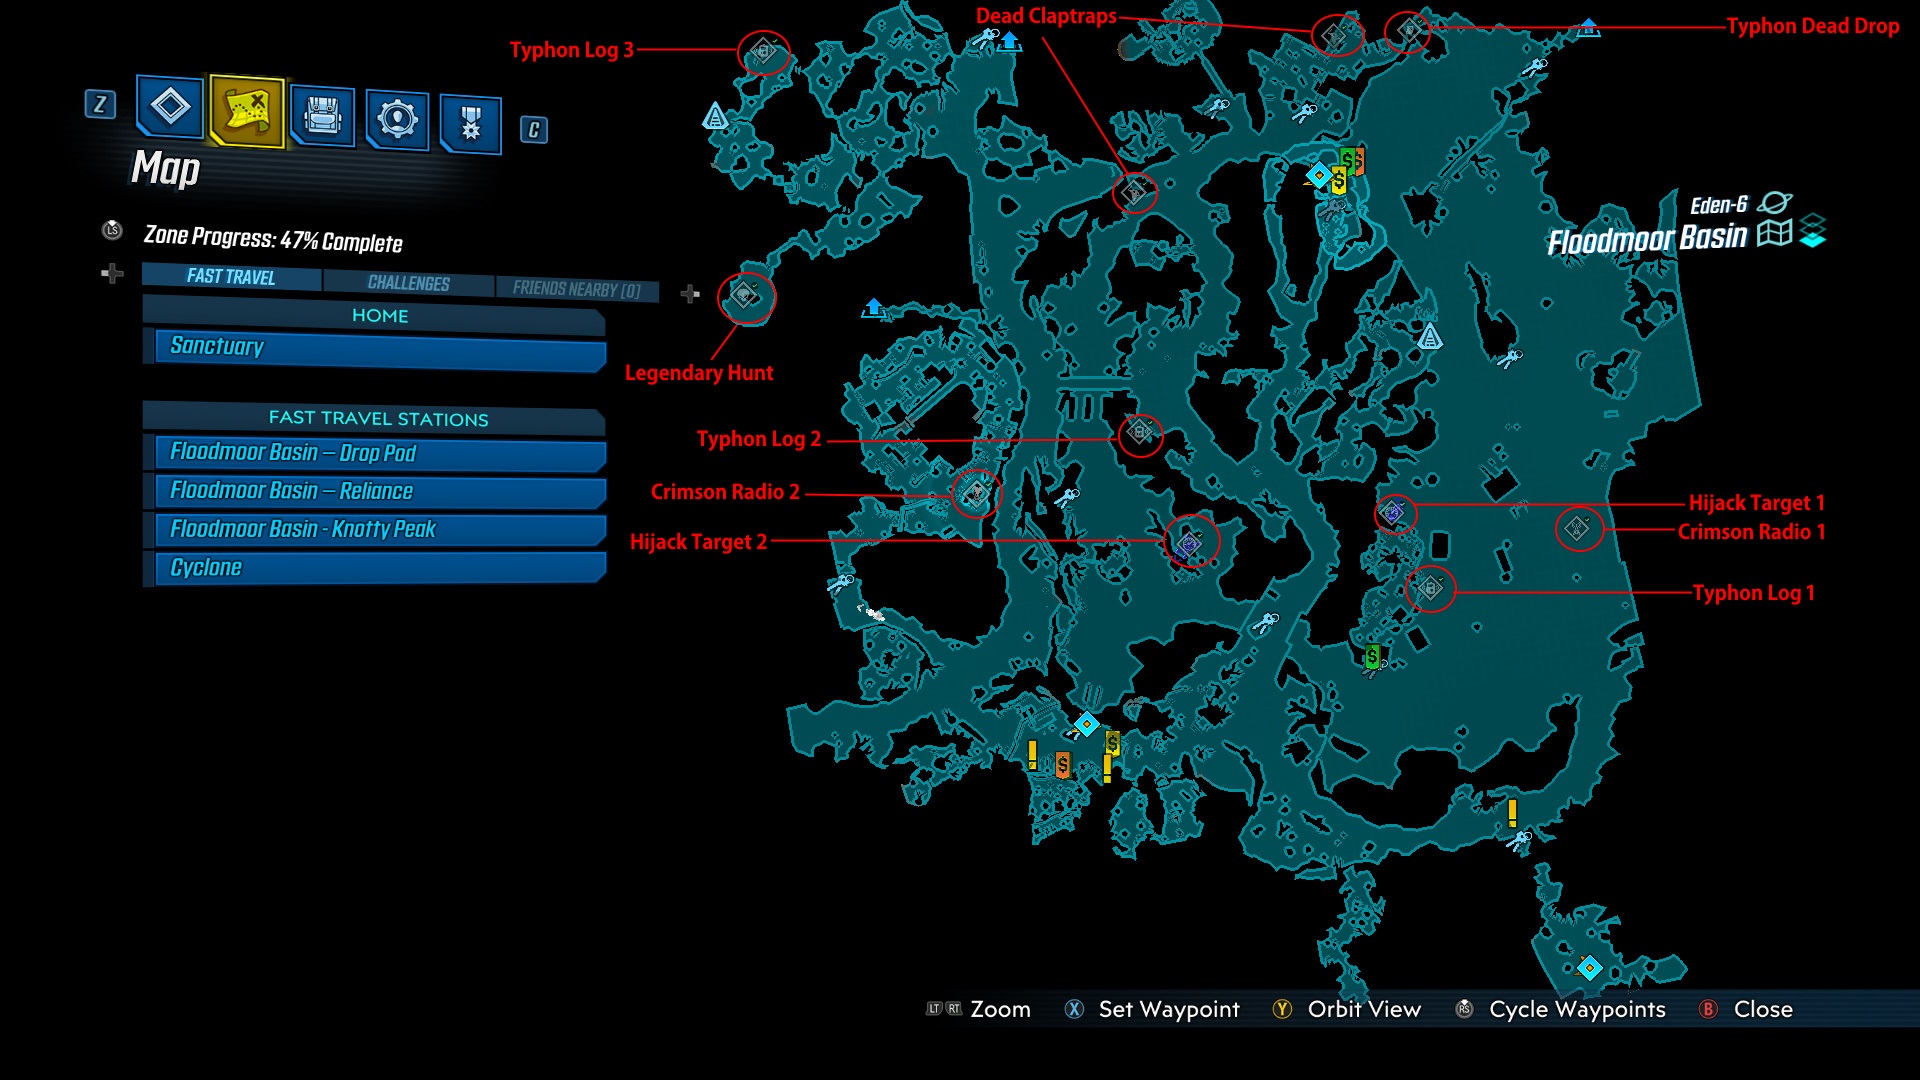
The Floodmoor Basin is a huge area you will need to traverse as you complete the main story. While you are completing the main story, also keep in mind this zone has nine Crew Challenges to complete. Check out the Floomoor Basin Crew Challenges locations map above.
Typhon Log #1: Mudhaven
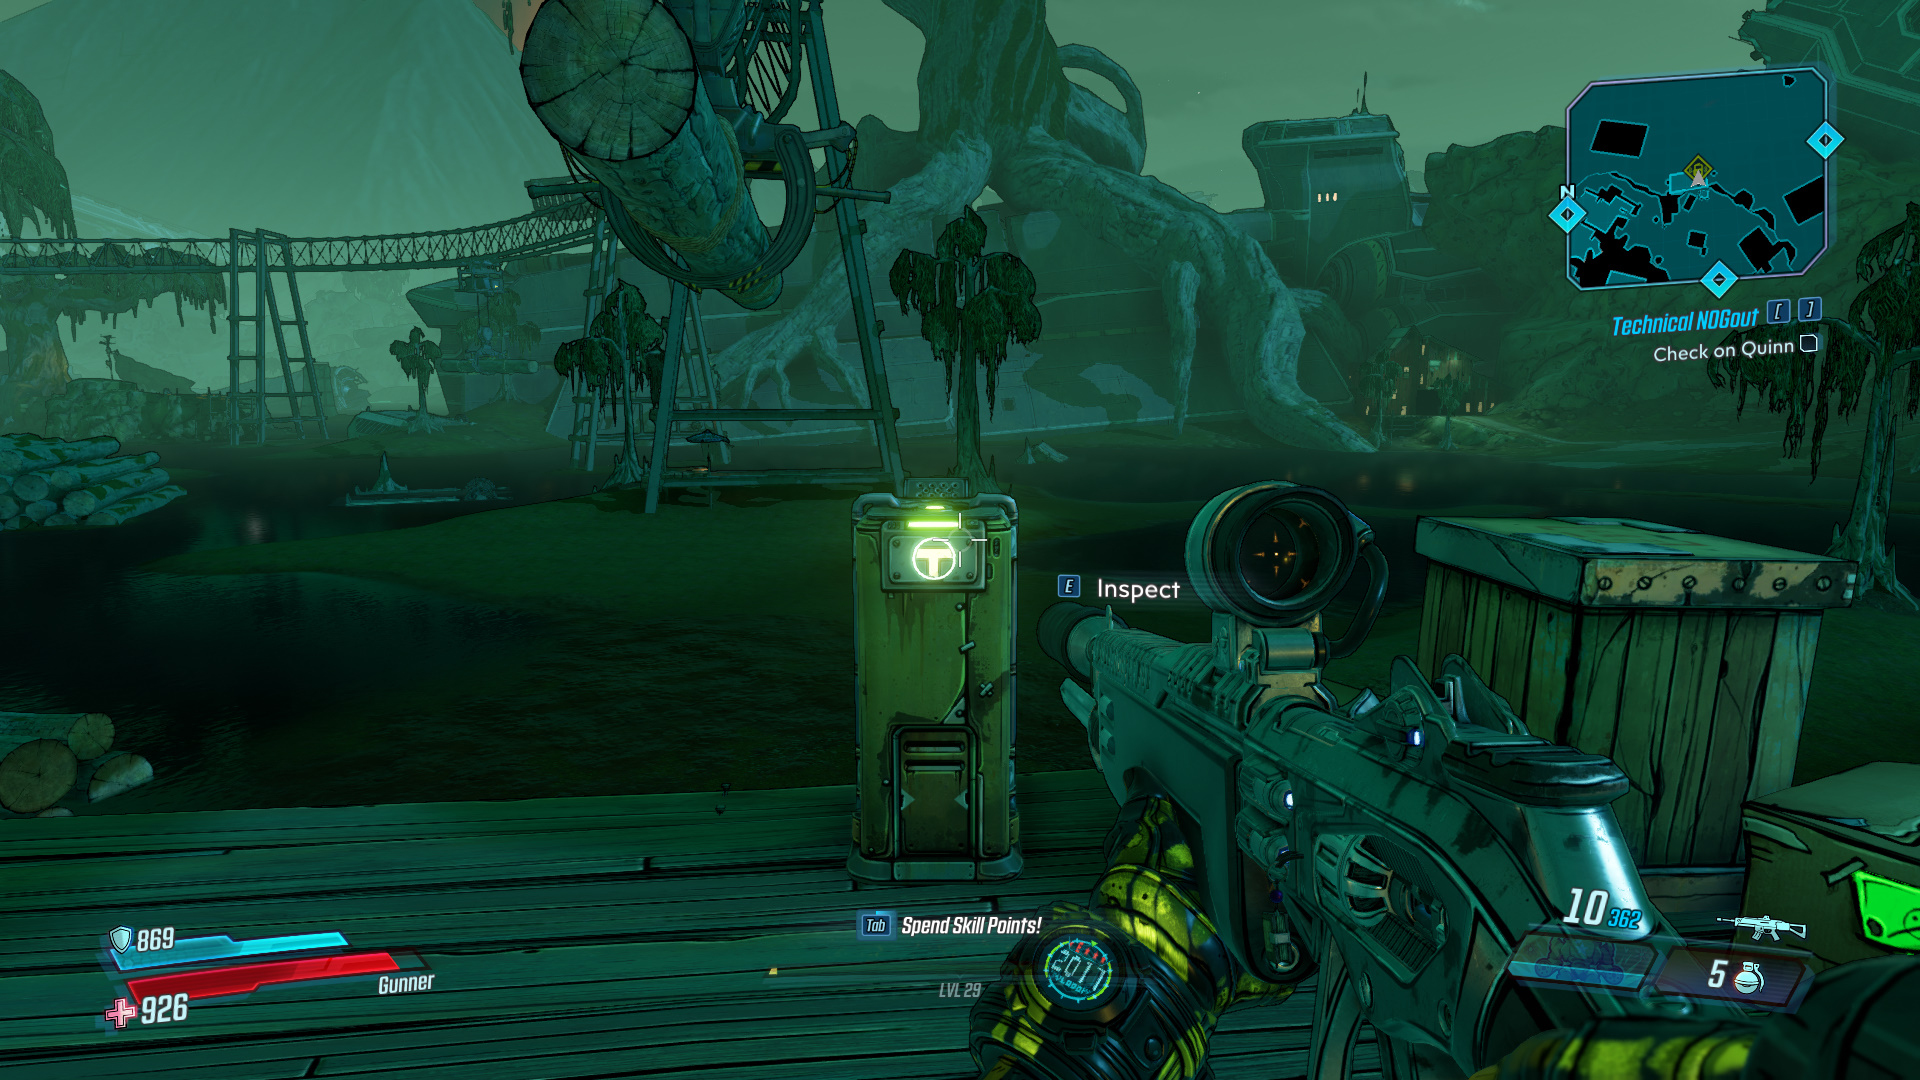
In the lower portion of the basin you will find an area called Mudhaven. Inside this area there is a Typhon Log on top of a platform beneath the log moving tracks. Jump on the container to reach it.
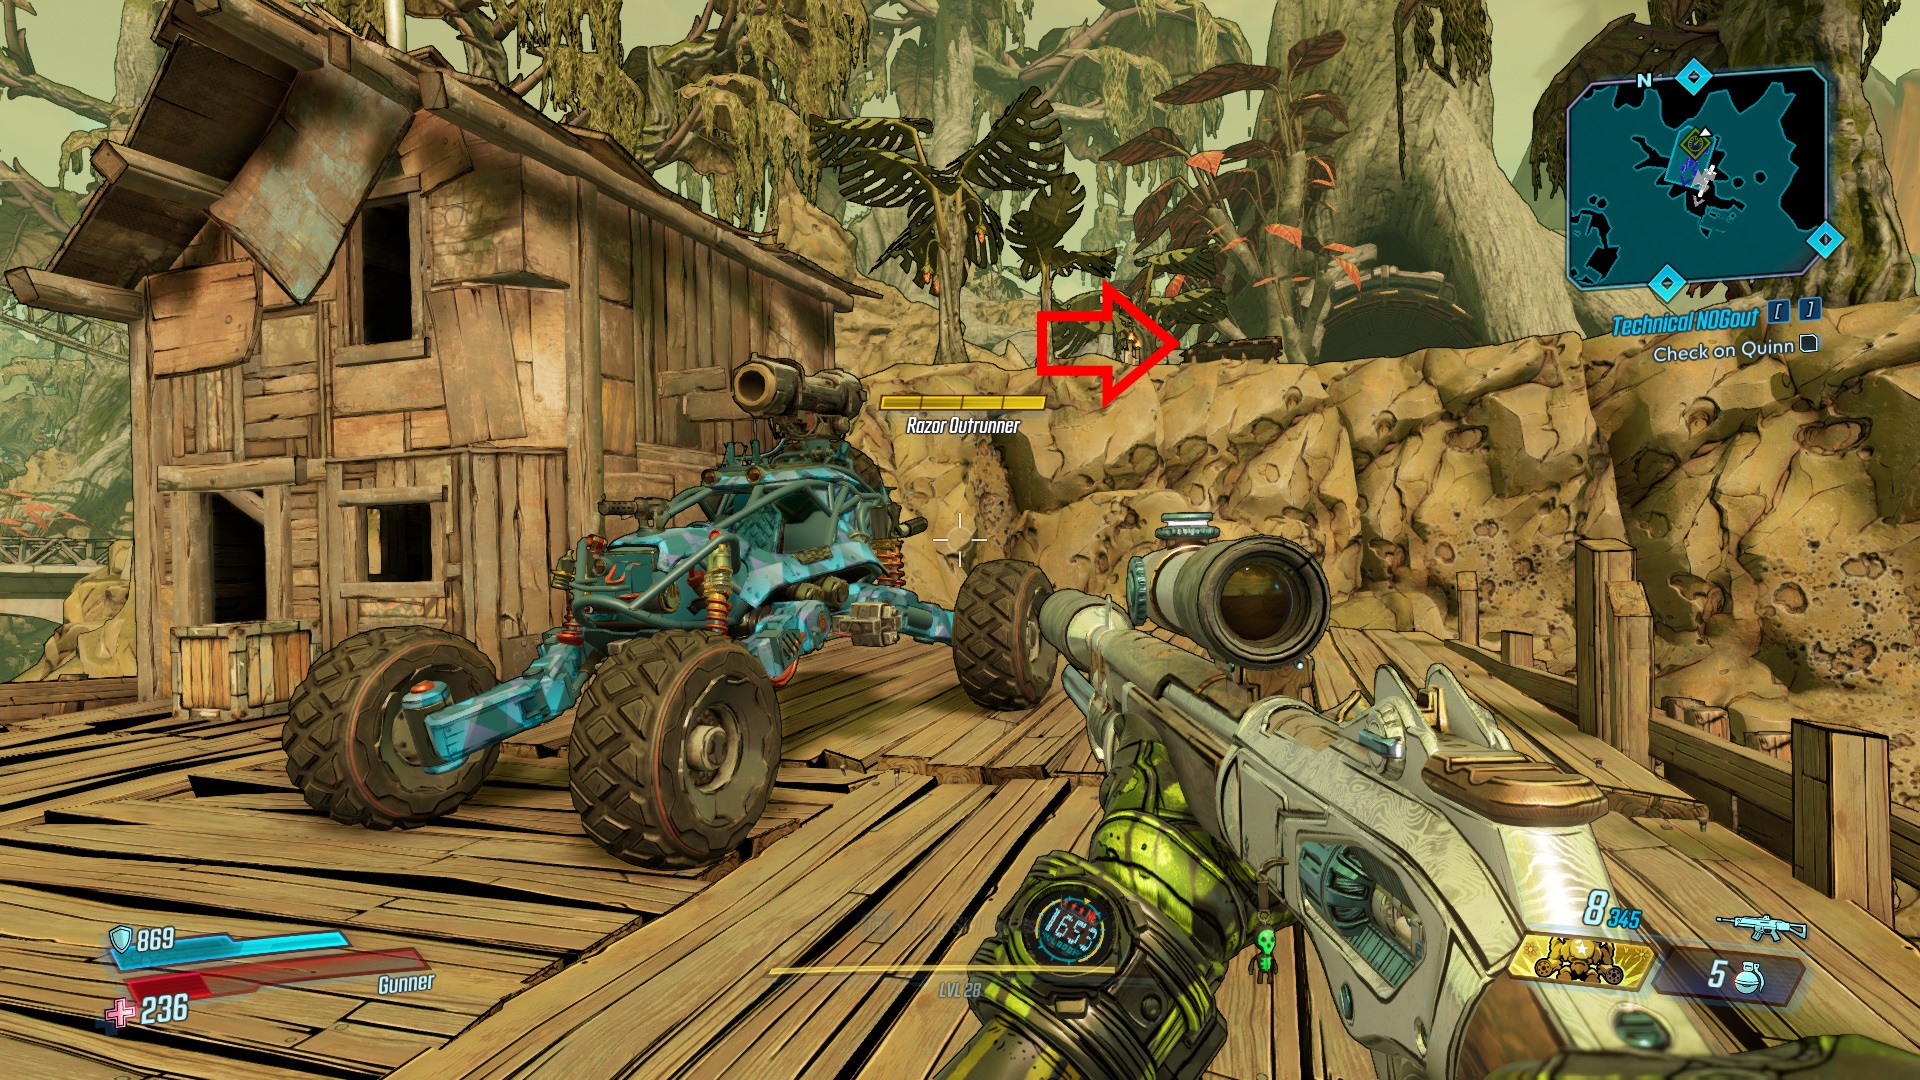
Hijack Target #1: Mudhaven

On the northwest corner of the Mudhaven area you will find a hijack target. It is on a platform attached to a building along the cliff edge. Jump over to the platform and bring the vehicle to the nearest Catch-A-Ride.
Crimson Radio #1: Floodmoor Basin

Head down into the Basin area and you will find this radio tower. To reach is climb up to the first platform then use the generator to jump to the metal bar above. Jump from that bar to the radio tower.
Dead Claptrap #1: Lumberton Junction

In the area of the Basin called the Lumberton Junction you will find a Dead Claptrap underneath the south deck of the large building.
Dead Claptrap #2: Floodmoor Basin

West of Dead Claptrap #1 you will find Dead Claptrap #2. This Dead Claptrap is stuck between a tree branch and a cliff face. Look for the tread marks on the cliffside to identify.
Typhon Log #2: Base of Knotty Peak

You will find this Typhon Log on the platform to the south of the bridge leading to The Anvil (Prison) and Reliance. It is sitting out in the open on the platform beside the statue of a head.
Hijack Target #2: Floodmoor Basin
The second hijackable vehicle is located in the valley to the south of the Typhon Log #1. This hijack target is sitting on a platform far up in the sky. To reach it, use the jump on the top of the valley by the entrance to Knotty Peaks.
Crimson Radio #2: Lumberhold

Inside the area called Lumberhold you will find a radio tower on top of a water tower. Climb the outside of the tower to reach the top where the computer is.
Legendary Hunt: Primeval Preserve

In the northwest corner of the Floodmoor Basin you will find the Primeval Preserve area. Inside this area you will find the Chonk Stomp named enemy.
Typhon Log #3: Primeval Preserve

North of the Legendary Hunt you will find the third Typhon Log on a cliffside in the Primeval Preserve.
Typhon Dead Drop: Near Lumberton Junction

Note: If you go to the here without gathering the logs, the chest is locked.
Once you’ve gathered all three of the Typhon Logs in this area you will unlock the Dead Drop. This Dead Drop can be found to the east of the Lumberton Junction beside a shack.
Next Crew Challenges Guide: The Anvil.
Very nice! The only map I found so far where all locations are displayed so you can visit them in an effective way. Thanks!