Shae Mo’sah Shrine Guide: Location, Puzzle Solutions and Treasure Chests
Lying just northeast of Goron City is the Shae Mo’sah Shrine. This shrine serves as the central fast travel location for Death Mountain and features a ton of treasure to be had. To help you get through this fiery shrine, I’ve thrown together a quick Shae Mo’sah shrine guide. Let’s get started.
Where is Shae Mo’sah Shrine (or the Goron City Shrine)?
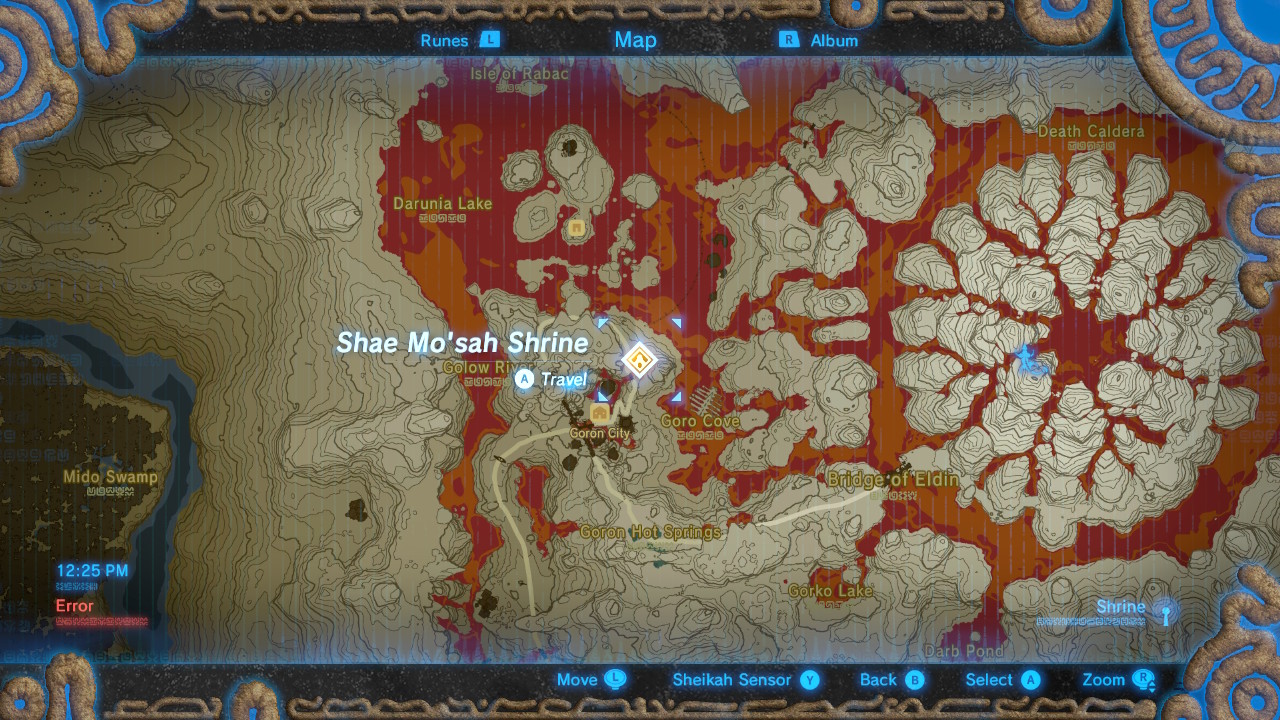
The Shae Mo’sah Shrine is located to the northeast of Goron City.
When you arrive in Goron City, you will probably be thinking two things: why is it so hot and where is the Goron City shrine? To answer the first question all you simply need to know is that Death Mountain is hot. Really hot. To answer the second question, take a look at the screenshot above. The Goron City shrine is located to the northeast of Goron City along the pathway you travel to rescue Yunobo (during the Divine Beast Vah Rudania quest). Once you reach the Shae Mo’sah Shrine, activate it and head inside.
Swinging Flames Guide

The trial at the Shae Mo’sah shrine is called Swinging Flames.
Now that we’ve located the Shae Mo’sah Shrine in Goron City, it’s time for us to complete it. The quest in Shae Mo’sah is called the Swinging Flames and it is a bit of a doozy. On the plus side, you will get a lot of treasure for completing it, so it’s well worth the effort.
Shae Mo’sah Room 1
-

- Use some sort of fire/explosive to destroy the shelve the barrel is sitting on.

-

- When the barrel is knocked to the ground, pick it up and place it on the pressure plate.

-

- Placing the barrel on the pressure plate unlocks the door to room 2.

In the first room of the Shae Mo’sah Shrine, you will need to use some type of explosive/flammable attack to destroy the shelf holding the barrel over the locked door. When you hit the shelf, the barrel falls to the floor and can be placed on the pressure plate. When the pressure plate is depressed, the door will open and you can head into room the second room of the Shae Mo’sah shrine.
Quick Directions
- Shoot/blowup shelf holding barrel over locked door.
- Place barrel on pressure plate to open locked door to room 2.
Shae Mo’sah Room 2
-

- When you enter room 2, head to the left for a treasure chest and right to go deeper into the shrine.

-

- In the area by the cog on the wall are three guardian scouts. Take them out!

-

- In the room with the guardian scouts is a treasure chest. Open it and then head up the ramp beside it to room 3.
Inside the second room of Shae Mo’sah, make a left and you should see a treasure chest near a lit torch. Inside the treasure chest is a Stone Smasher. Grab this weapon (if you want) and head away from the chest towards the large cog on the wall. Take a right at the cog and you will see three guardian scouts. Take them out and head to the right side of the room to find a treasure chest with a Ruby inside. Walk up the ramp by the treasure chest and into the next room/area.
Quick Directions
- Head right into the room past the giant cog on the wall.
- Take out three guardian scouts (or run by them) and head up the ramp near the treasure chest.
Shae Mo’sah Room 3
-

- Before you head up to the pressure plate, grab the treasure chest on the lower floor.

-

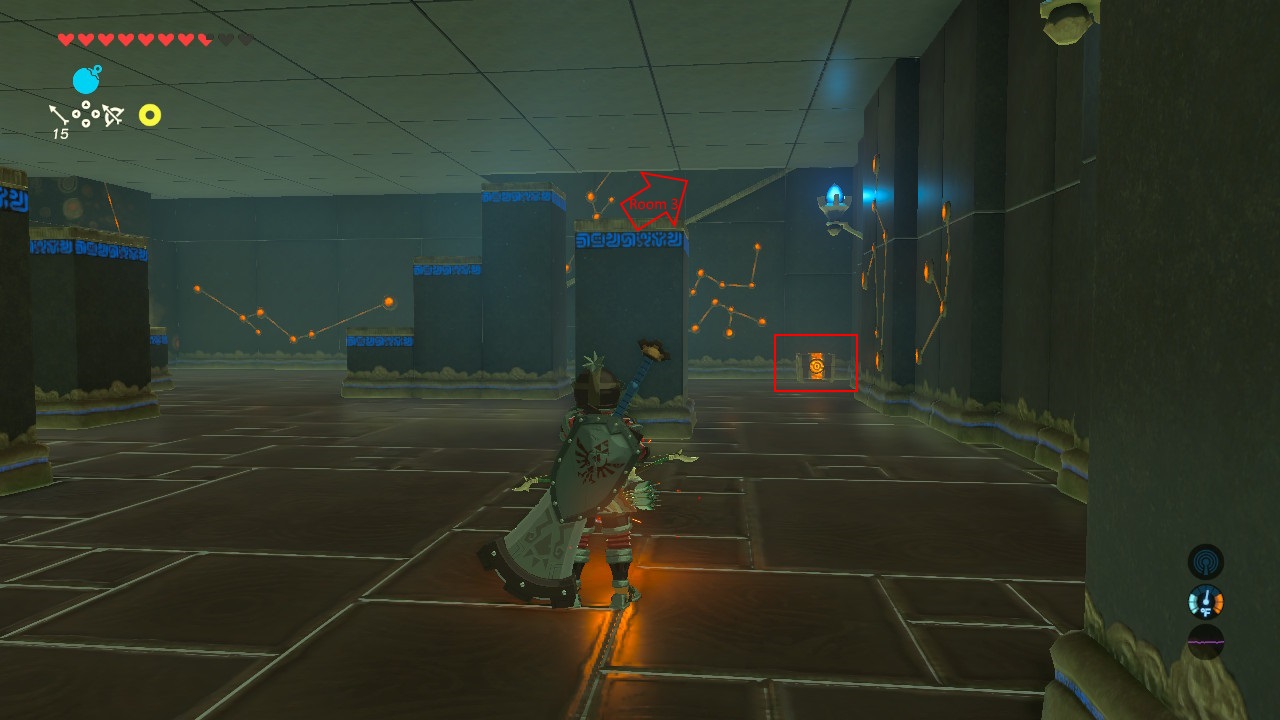
- Use flames or the lantern that appears to burn the shelf the metal ball is sitting on.

-

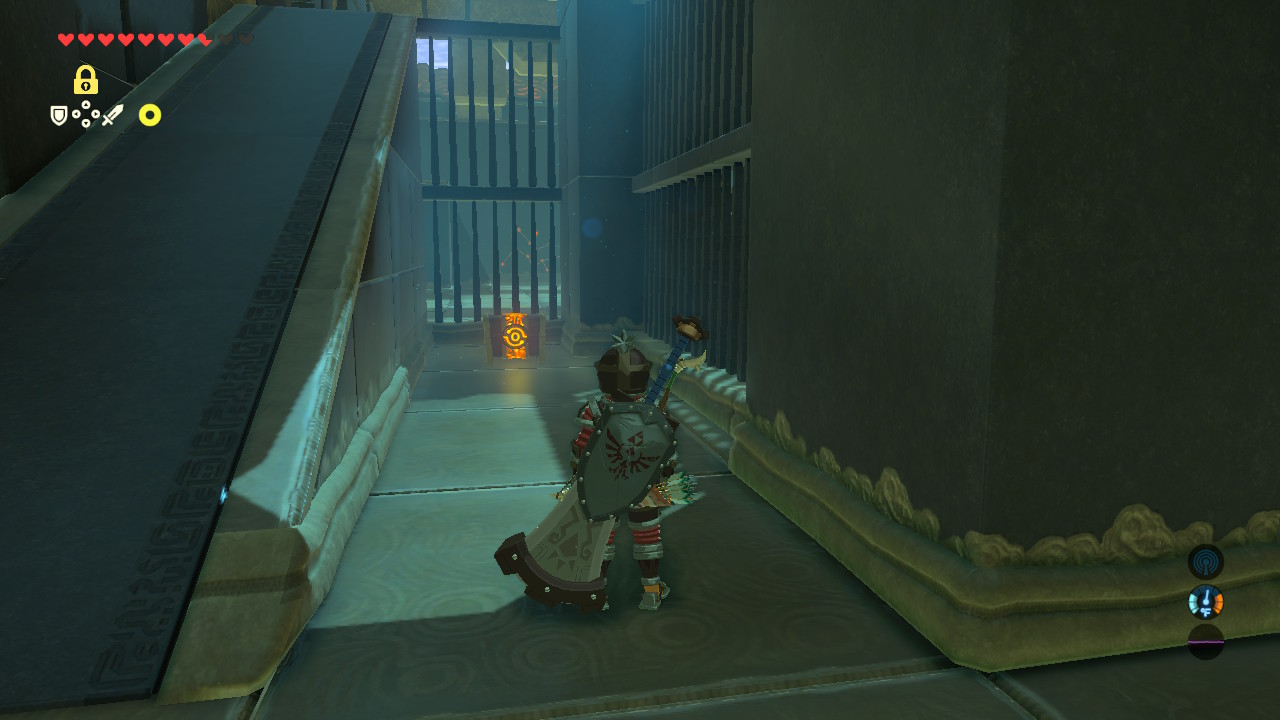
- Head down this hallway and hang a left to reach teh next pressure plate.

-

- When you step on this pressure plate, you allow metal ball to continue rolling. The ball hits the cog and opens a locked door.
-

- Open the treasure chest in this room to receive the small key.
When you head up the ramp, you’ll see a locked door in front of you and staircase with a pressure plate to your right. Don’t go up the stairs just yet. Instead, stay on the lower floor and walk past the stairway where it wraps around into a corner. Walk around the corner and you should see a treasure chest. Open the chest to receive 10 ice arrows.
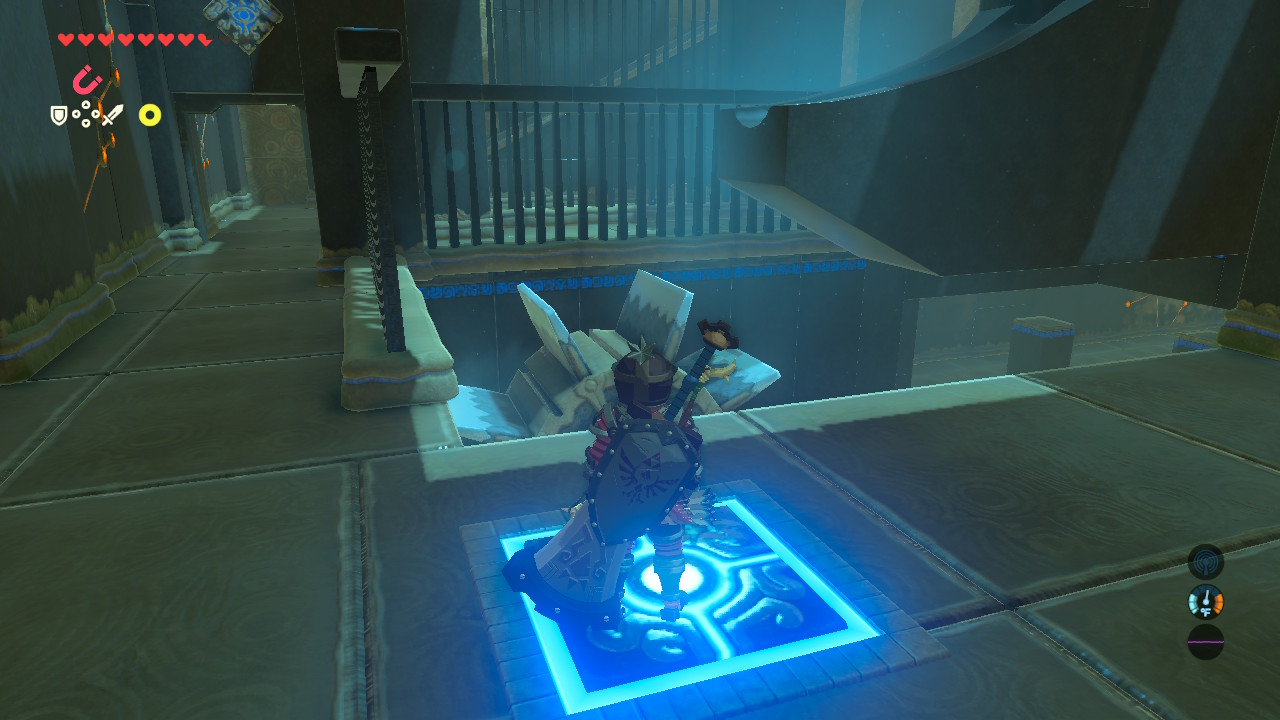
Head back to the top of the ramp and make your way up the staircase to the pressure plate. Stand on the pressure plate to release a hanging lantern. Use magnesis on the lantern to swing it towards the foliage beneath the shelf with the metal ball on it. Doing this lights the foliage on fire and causes the ball to fall and roll down the ramp.
Walk down the halway parallel to the ramp the ball rolls down. Hang a left at the shut door and you will come upon another pressure plate. Stand on the pressure plate to open the gate for the metal ball to continue rolling. The ball will roll onto the cog we saw earlier. This opens the door beside the hallway we ran down. While doing this sequence you need to be quick getting through the unlocked door as it will reset. Note: you can cast stasis on the cog before dropping the ball on it and then walk to the door to make this way easier. Open the treasure chest in the room to get a small key. Return to the locked door at the top of the ramp.
Quick Directions
- Head up the staircase with the pressure plate on it and stand on the pressure plate.
- Use magnesis on the lantern to light the foliage on fire; freeing the metal ball to roll down the ramp.
- Run down the hallway parallel to the ramp the ball is on and hang a left towards another pressure plate.
- Stand on the pressure plate to get the ball rolling towards the cog. Run towards the locked door.
- Open chest and grab small key.
- Return to locked door at top of ramp (you came in on).
Shae Mo’sah Room 4 (Locked Door)
-

- Use the small key to open this locked door.

-

- Inside the locked door is a room with a puzzle similar to those we’ve seen up to this point. All you need to do here is knock the barrel to the ground and place it on the pressure plate.

-

- Waiting at the end of this shrine is Shae Mo’sah.

Use the small key to open the locked door and make your way inside. In the locked room use something flammable (such as the lanterns that appear when you stand on the ramp pressure plate) to light the foliage on fire to drop the barrel. Grab the barrel and place it on the pressure plate near the door. Head through the unlocked door to meet Shae Mo’sah and collect a spirit orb.
Quick Directions
- Use fire to get barrel to the floor.
- Put barrel on pressure plate near door.
- Go through and meet Shae Mo’sah.
Shae Mo’sah Shrine Treasure
Here’s a quick list of all the treasure inside the Shae Mo’sah Shrine:
- Stone Smasher.
- Ruby.
- 10x Ice Arrows.
- Small Key.