The End is Nigh Guide

Retrograde lies directly between The Split and The Machine. This world is a touch shorter than normal worlds and introduces a bit of a new mechanic to the game. Completing Retrograde moves us one step closer to fully building our friend. Let’s do it!
Retrograde 1

Strategy: Drop down to the hook and jump to the right hook. Run to the exit.
Retrograde 2

Strategy: Drop down when the spike on the left is out of the way. Jump to the right platform and make your way to the exit.
Retrograde 3

Strategy: Jump up the platforms as when the spikes have withdrawn. You will more then likely need to stop halfway and then continue on.
Retrograde 4

Strategy: You need to drop down when the spikes have withdrawn. Timing wise, you can make the hook if you drop down as soon as the top hook begins to disappear. Once on the hook, jump to the moving spiky platform and ride that to the exit.
Retrograde 5

Strategy: The trunks in the room move up/down. Use the hooks on the trunks to make your way across the room.
Retrograde 6

Strategy: The breakable blocks in the bottom of this room move both left and right. Use these blocks to cross the room. Time your jump so you have a clear path to the exit platform.
Retrograde 7
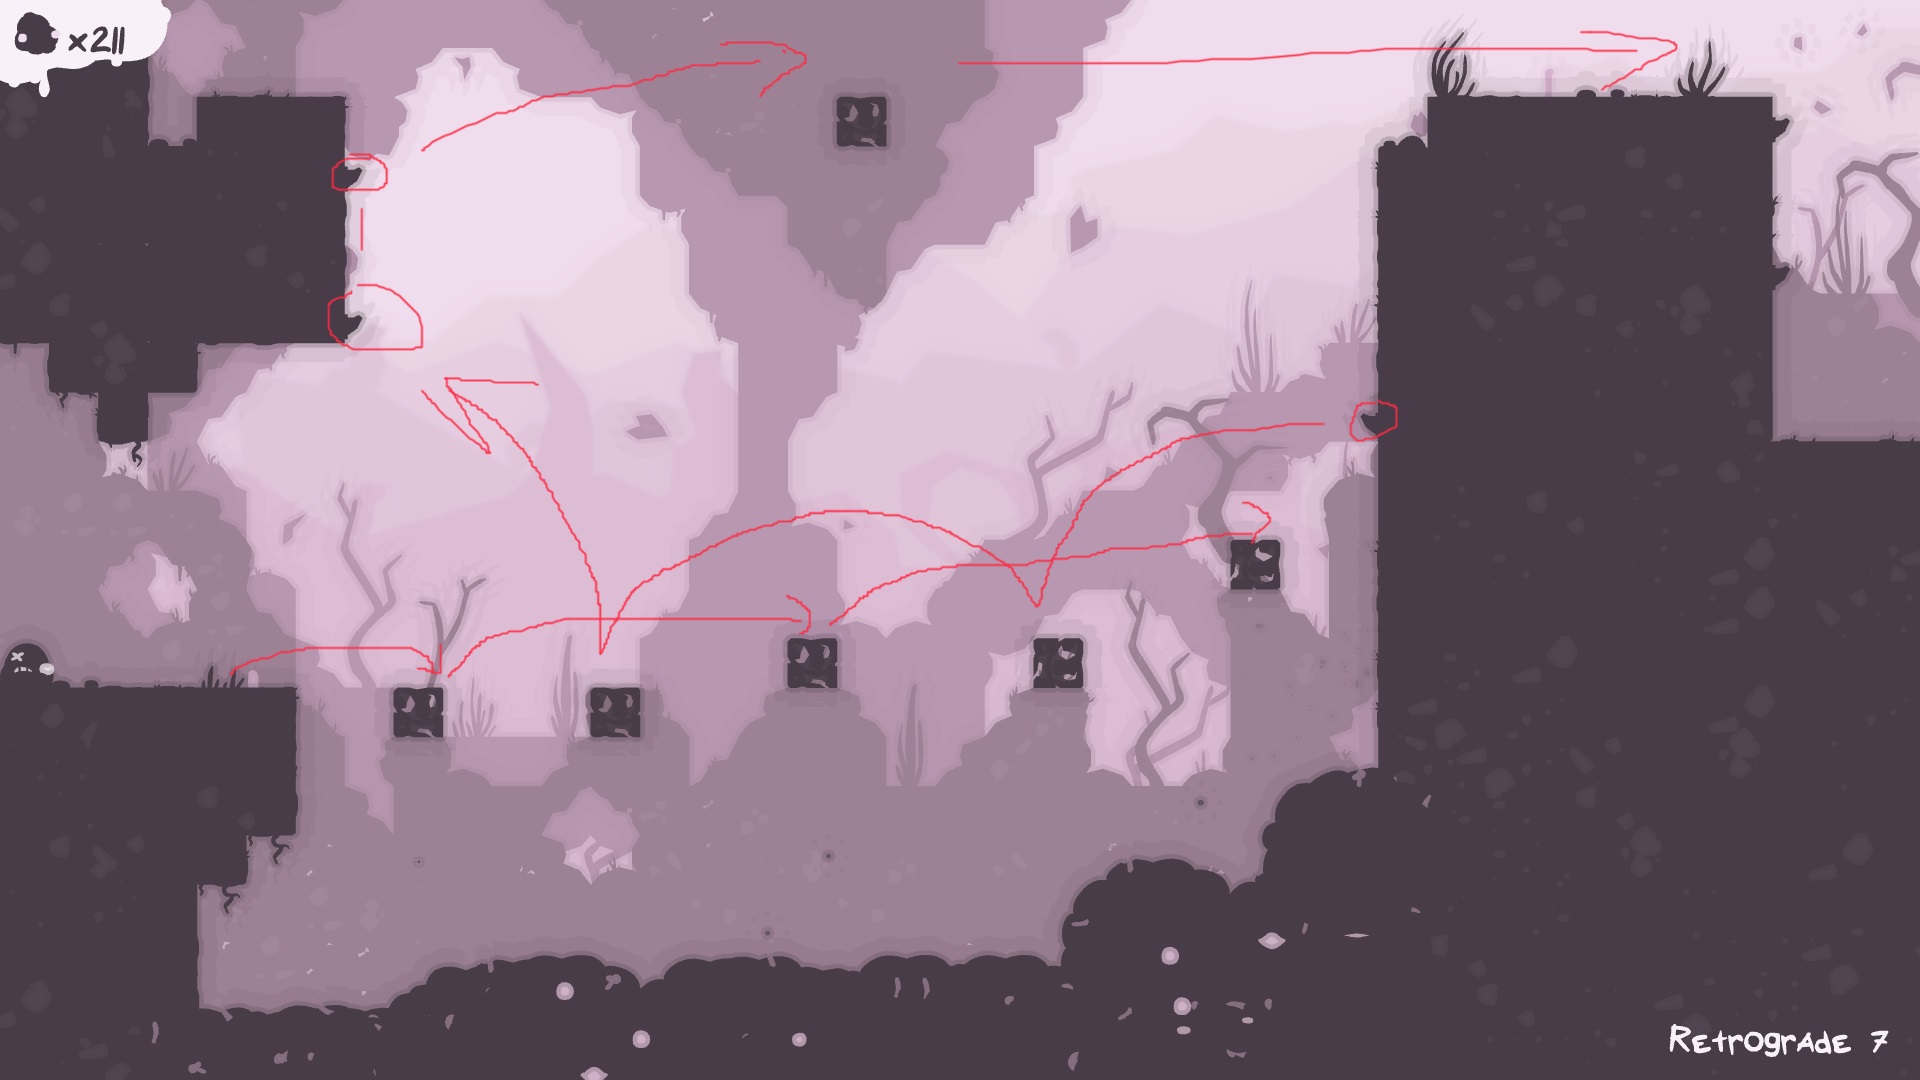
Strategy: Use the 1, 3, 5 block to reach the hook. Then use the 4, 2 blocks to access the hooks on the now lowered platform. Jump up the platform and access the hook the appears in the upper left. Jump to the lone breakable block and then ledge jump to the exit.
Retrograde 8

Strategy: In this room, there are a bunch of breakable blocks that fall from the sky at various speeds. You need to make you way up them to reach the exit. Get higher as quickly as possible.
Retrograde 9
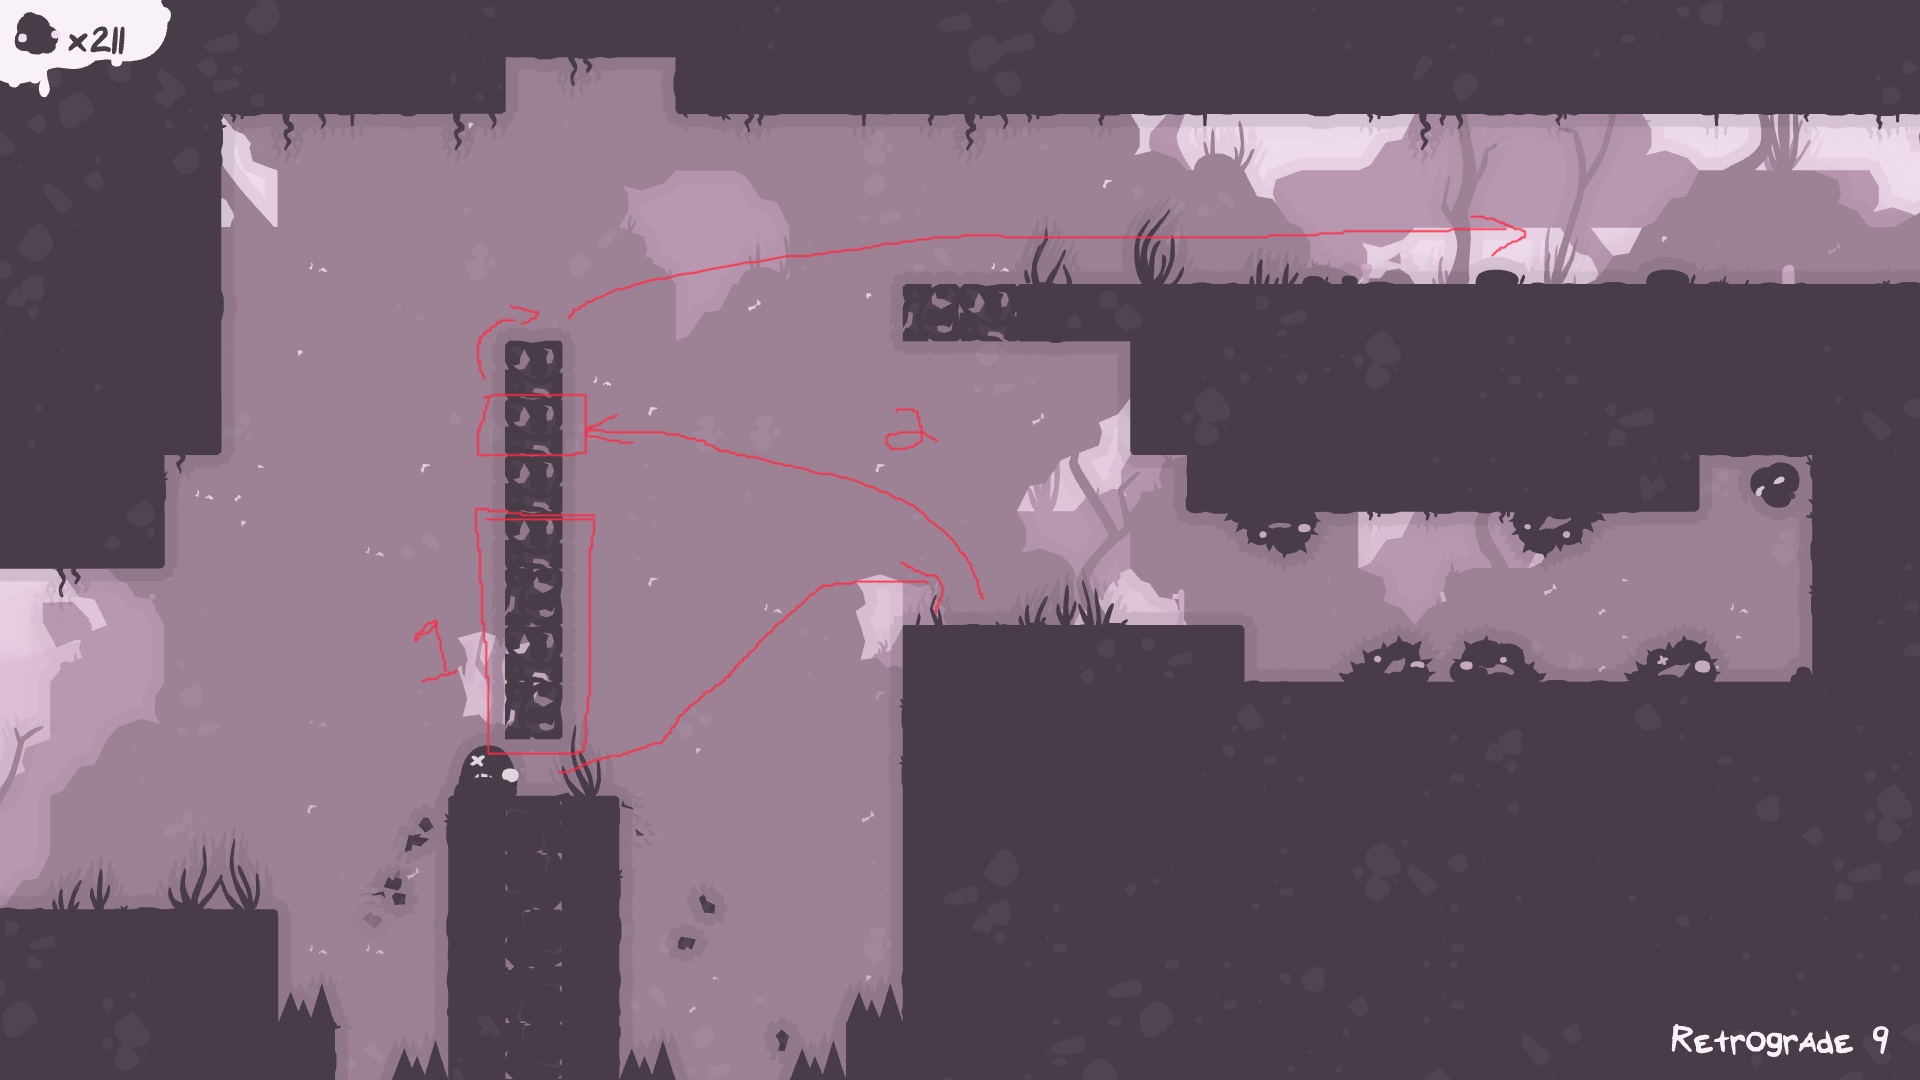
Strategy: Strategy wise, you can pretty much approach this however you want. How I did it was knock out the lower four blocks, jump to the middle and then knock out the middle of the top three blocks. Use the space to jump up to the higher block and then jump to the exit platform.
Retrograde 10
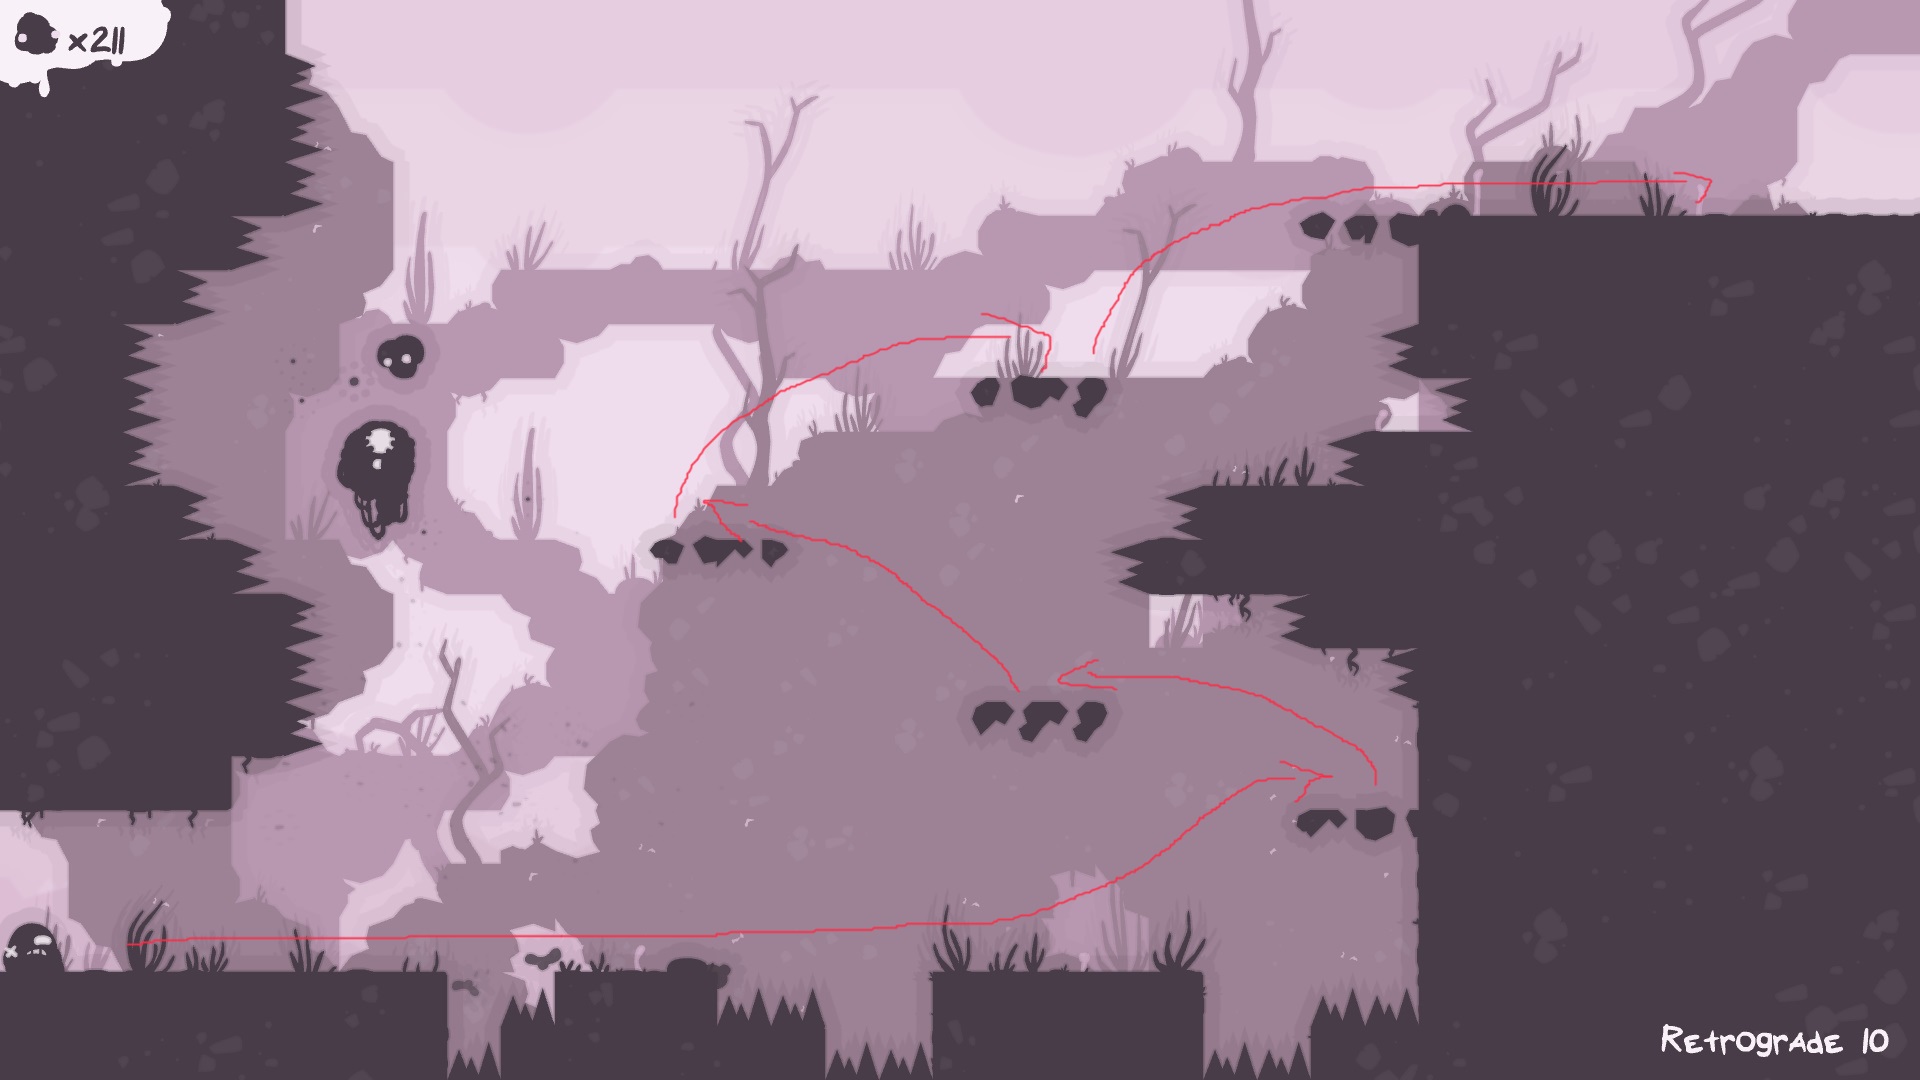
Strategy: Avoid the turret shots and use the platforms to reach the exit.
Retrograde 11

Strategy:
Retrograde 12

Strategy: This room is abit misleading. While the premise is simply to use the clouds to reach the exit, there exists a wrinkle in the three turrets. These turrets shoot where you previously were so you need to move quick. Time your jumps and this level is manageable but it will probably take a few tries.
Retrograde 13

Strategy: The First block you jump down onto will start to sink. Make your way over to the hook on the right to trigger the platform to collapse. While waiting for the platform to collapse, you need to avoid the black goo that rises up beneath you. The best approach is to jump between the two remaining blocks back and forth. Jump up to the platform when it is low enough to reach the exit.
Retrograde 14

Strategy: The moment you trigger the hook on the middle island the platform begins to sink. Quickly make your way to the hook on the right island then jump back to the center and go up to the vertical block. Ledge jump off the block to the right platform and then jump over to the exit.
Retrograde 15

Strategy: The goal here is to use the small blocks to make your way up to the exit. The problem is that there is a bunch of black goo that wants to stop you from doing that. To get through this, you need to go fast. Like sonic fast. Follow the path in the picture above and you will be okay.
Retrograde – World Run Through
If My text guide failed you, take a look at this World Run through video I put together. This may help you visualize a bit more what my strategies were for completing each level in Retrograde.