Zorah Magdaros Guide: Monster Weakness, Carves & Rewards, Armor Sets – Monster Hunter World
Monster Hunter: World’s main storyline centers around a monster by the name of Zorah Magdaros. This giant, hulking creature leaves a path of destruction wherever it goes, and is the reason you shipwreck at the start. Since the game is called Monster Hunter, it’s only natural that we will kill this monster. With that being said, Zorah Magdaros is not a conventional monster and will be fought a total of two times during your playthrough. To help you slay the beast, here’s our Zorah Magdaros guide.
Zorah Magdaros Information
-

- This is the Zorah Magdaros Physiology report. Here you can see the various weak and breakable points on this monster’s body.

-

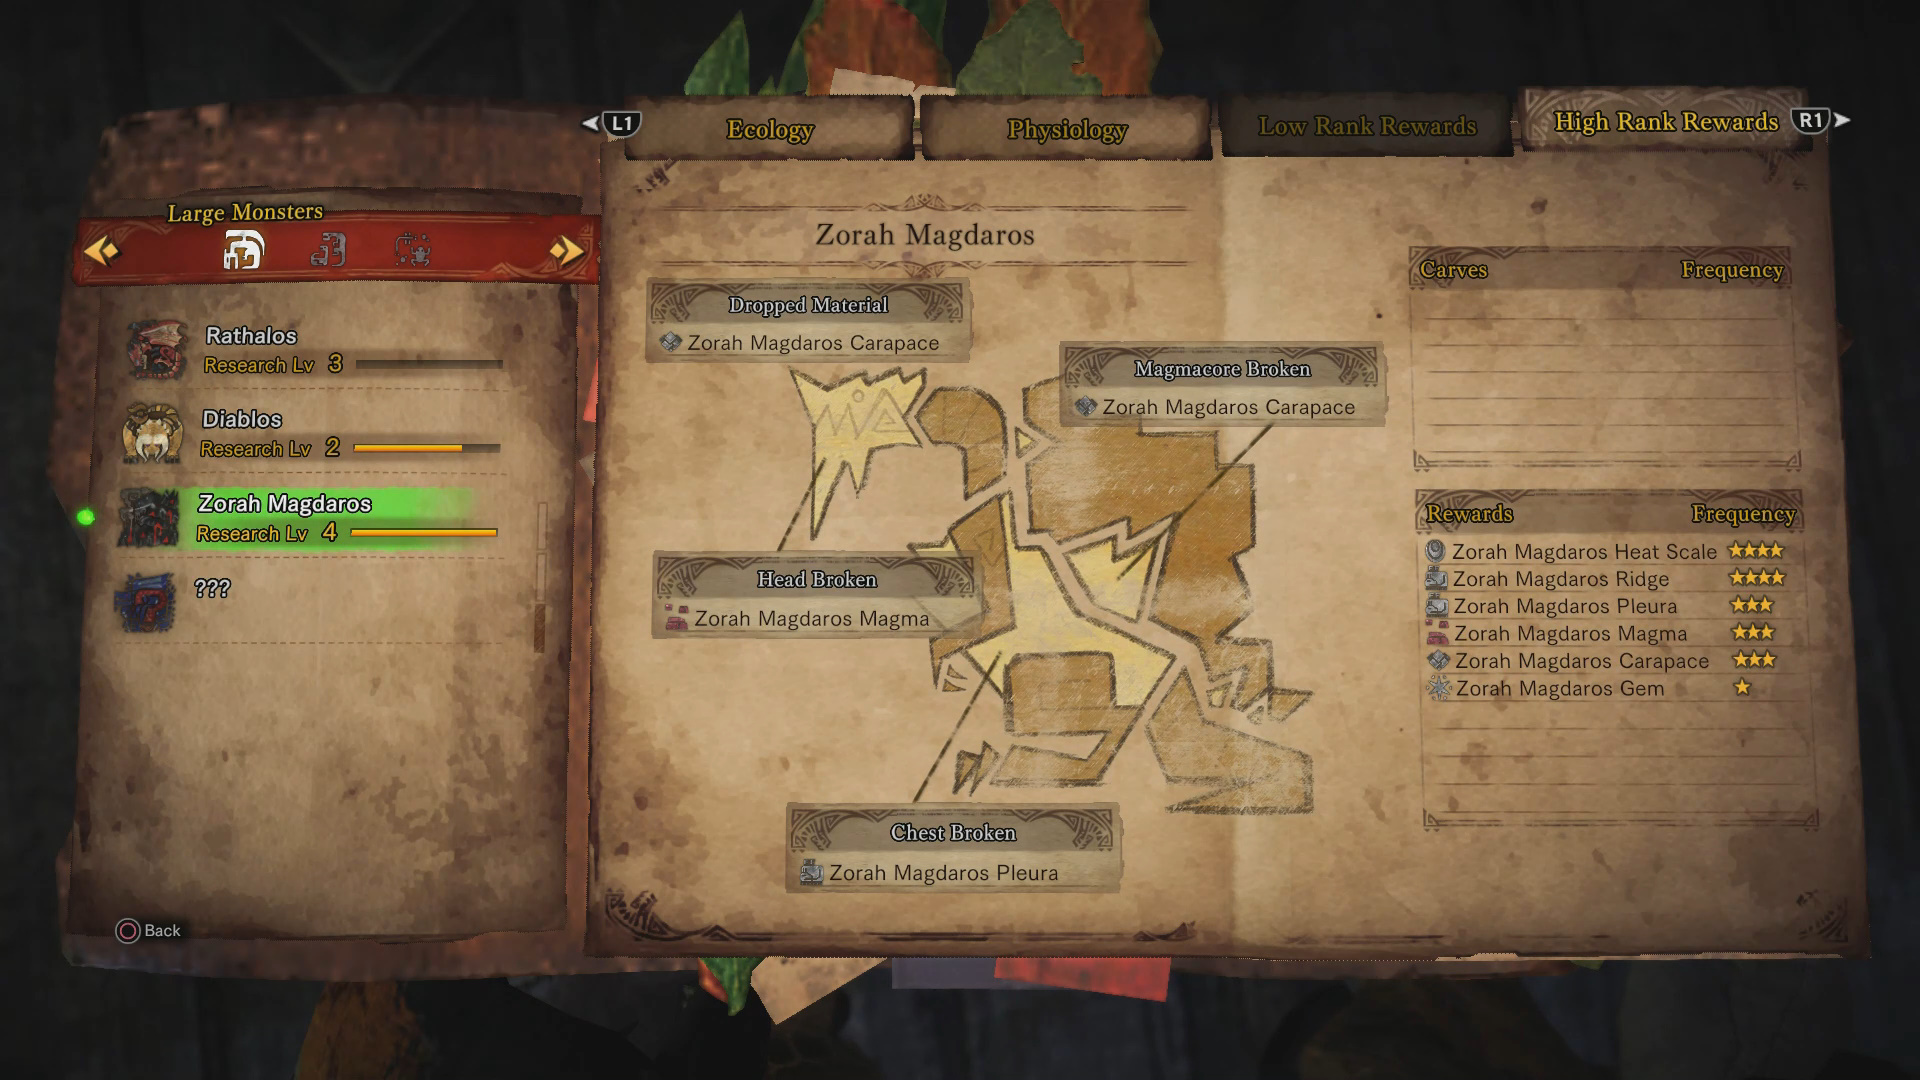
- This is the Zorah Magdaros High Rank Reward report. Magdaros doesn’t not give any Low Rank Rewards.
Difficulty: Insane (6⭐) -> Misleading
Location: Everstream
Size: Huge
Species: Elder Dragon
Weak To: Water 3⭐, Dragon 3⭐
Weak Points (Severable/Breakable): Head (Weak Point), Stomach (Breakable), Other Stomach Piece (Breakable)
Material (High Rank Carves + Rewards ):
| None | Zorah Magdaros Heat Scale (⭐⭐⭐⭐) Zorah Magdaros Ridge (⭐⭐⭐⭐) Zorah Magdaros Pleura (⭐⭐⭐) Zorah Magdoras Magma (⭐⭐⭐) Zorah Magdaros Carapace (⭐⭐⭐) Zorah Magdaros Gem (⭐) |
Reward Money: 8200 z
Storyline Quest: A Colossal Task
Hunting Quest Text: “The operation is set to commence in the Everstream. Do everything you can to force Zorah Magadros out to sea. We must not fail! May the Sapphire Star light our way!”
Characteristics: An elder dragon that rises from the earth like a volcano. Where it’s headed, and why, the Research Commision has yet to figure.
Useful Information: Normal attacks can’t make a dent in its mountain-like shell. Utilize larger weapons such as cannons and ballistae, or directly attack the “magmacore” heat organs that are exposed in parts of its outer shell.
Zorah Magadros Boss Fights Guide
You will fight Zorah Magdaros twice throughout the storyline in Monster Hunter: World. The first time is during the One for the History Books, and the second time is in the A Colossal Task. Both quests play out very closely to one another, but occur in reverse order. If you want to read about the One for the History Books quest, I’ve covered it here.
The fight in A Colossal Task is Monster Hunter: World’s final story mission. In this mission you are tasked with guiding Zorah Magdaros out to sea. This is done by starting on Zorah Magadross body and then transferring to a large barricade for the final assault.
Magadros Body
On Magdaros body, you will be tasked with destroying the Magmacores you find. There are three in total that you can destroyed (marked on minimap). The Magmacores in this quest are a bit more dangerous than the previous quest, as they will spew magma that can damage and burn you.
While destroying the Magmacores, Nergigante will apear. You need to briefly fight it to scare it off. Once Nergigante is scared off you can go back to destroying Magmacores, before you will be transferred to the barricade.
Barricade
On the barricade, you will do what you did in One for the History Books. Use the defensive weaponry setup along the wall to damage Zorah Magdaros. Eventually, once you’ve done some damage, you will be able to jump down onto a ship (far left-side when facing Magdaros) and fire the Dragonator. Complete this circuit a few times and Zorah Magdaros will fall.
Note: Upon completion of A Colossal Task, you will gain access to a High Rank expedition that starts automatically (head to Wildspire Waste at your Handler’s orders). Once complete, you will gain access to High Rank content. Unlocking High Rank content will also cause the Zorah Magdaros mission to appear every so often. This means you can farm mats pretty easily for Z and Zorah α+β Sets.
Zorah α+β Sets (Rarity 6)
-

- The Zorah α set on a female hunter.

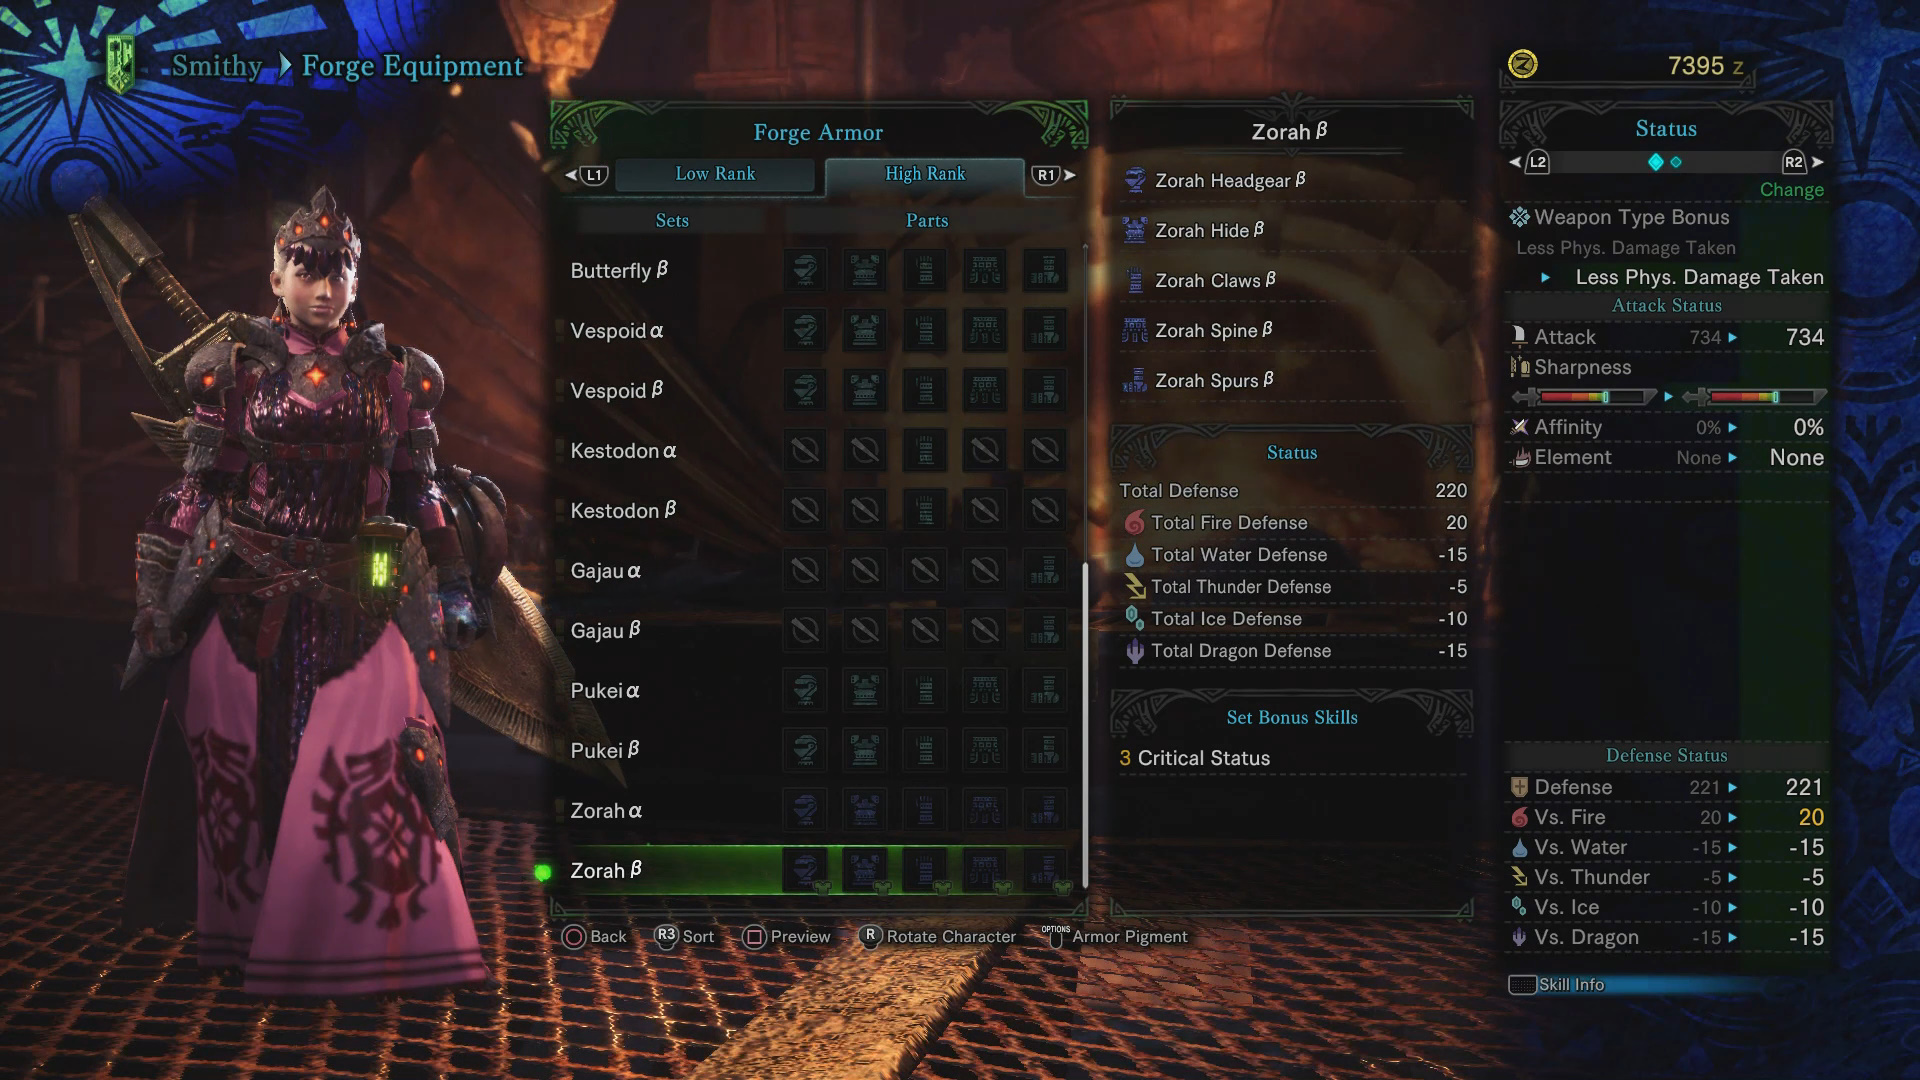
-

- The Zorah β set on a female hunter.
Zorah α + β Armor Requirements:
Human: All Materials are Zorah Magdaros Rewards unless noted.
- Headgear – 2x Scale, 2x Ridge, 6x Carapace, 8x Dragonite Ore*
- Hide – 6x Carapace, 1x Scale, 2x Ridge, 1x Pleura
- Claws – 3x Scale, 3x Pleura, 2x Magma, 8x Dragonite Ore*
- Spine – 8x Carapace, 1x Scale, 3x Ridge, 2x Magma
- Spurs – 3x Ridge, 3x Carapace, 3x Magma, 1x Gem
Set Bonus (3 or more pieces equipped): Zorah Magdaros Mastery (Critical Status) – Increase abnormal status effect damage (paralysis, poison, sleep, blast) when landing critical hits.

The Zorah Set α on my Palico.
Palico: All materials are Zorah Magdaros Rewards unless noted.
- Puppet – 1x Magma
- Crown – 1x Heat Scale
- Suit – 1x Pleura
More: Monster Hunter: World monster guides